The Magic Behind Our Knowledge Base GIFs
Come dive into my weird GIF making process where I show you how I create animated images for our knowledge base.
I thought it was about time I wrote this article. For years people have asked how we do our fancy GIFs on our knowledge base. I did touch on GIFs in a previous post but that was a long time ago and it wasn't good (bad past me).
Let's be clear—I'm no expert. I wrangled something together after a while and stuck with the format. Take my advice here with a pinch of salt and a generous dollop of customization.
I'm going to go from A-Z in this post and just to spice things up a little guess what I'm gonna use to explain it. Yep that's right...GIFs! Before we go down the rabbit hole of my terrible sense of humor let's move on shall we?
Let's talk about Screenflow
The real kicker here is that you'll need a Screenflow license before attempting to go any further. I know—it's expensive. And to be honest I'm not a fan of their per-user per-version license model (I'm too used to SaaS).
Anyway I digress. There's two things I like a lot about Screenflow.
First of all it's easier to use than Adobe Premiere which is a great thing because I get absolutely lost in there. Secondly it comes with video actions which was basically a way to transition zooming and panning quickly. This second point is where all the magic comes from.
So if you're willing—or your boss is willing—to pay the $129 per-user per-version for Screenflow let's move on. If not you might need to find another piece of software and somehow follow along.
Preparing for the Recording
First things' first. Prepare your Screenflow document. I have mine set up as a 1080 HD 30 fps file. I find that works well enough for me.
Ok so if you're a fan of the GIFs in our knowledge base you're gonna be disappointed right now. I have a separate desktop set up on my Mac just for recording GIFs and y'know what? I use the browser to cover up all the crap on my desktop.
Having a separate desktop on my Mac helps me keep things organized. When I need to record a new GIF I just swipe, select the page, and start recording.

Then I load up Safari. And I know what you're thinking. "Why don't you use Chrome?". I do usually. It works well for me but for recording it's a little cluttered. I have 10 extensions and it's not super appealing and could distract the viewer.
And then I prepare the page I want to record. For this I use a demo account that won't affect anything on our support knowledge base.
Ah and I nearly forgot! Make sure you turn any notifications off. You don't want a newsletter about the next best houseplant to pop up (guilty 🙋♀️🌿).
So let's go through an example. I want to show the Stale feature off in this GIF. First I swipe to the desktop, load up Safari, and head to an example article. Now I'm ready to get going with the recording.
Time to fire up my precise mouse skills.
Recording the screen
Screen recording is a skill you have to learn. When I started doing this I thought it'd be easy. The thing is when I'm usually using a piece of software I flick my mouse all over the place. And that is so distracting for someone who wants to know what to do.
I need to know where I'm going on the screen before I press record because it'd be really obvious if I don't:
I trace my steps in my mind. Article. Stale. Set Stale now. Once I have that pinned down it's time to press record. I usually use the shortcut ⌘ + Shift + 2.
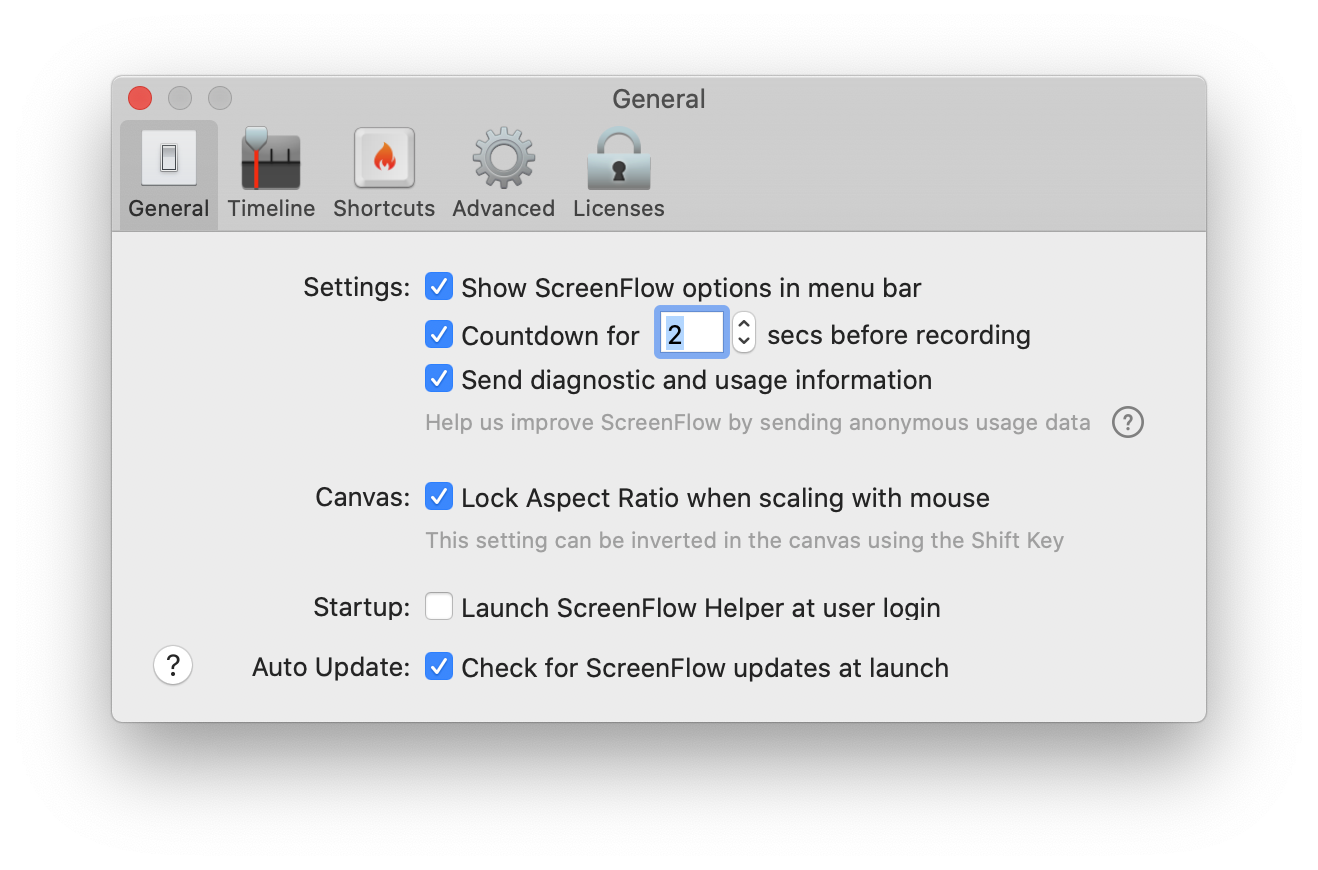
By default (in my version at least) it counts down for 5 seconds which is way too long so I shortened it to 2 seconds in Preferences > General. Just enough time to turn it off if I'm not quite ready to rumble.
And there isn't much more to it. I make sure to make smooth and deliberate mouse movements and stop the recording with ⌘ + Shift + 2. Here's the recording in real time:
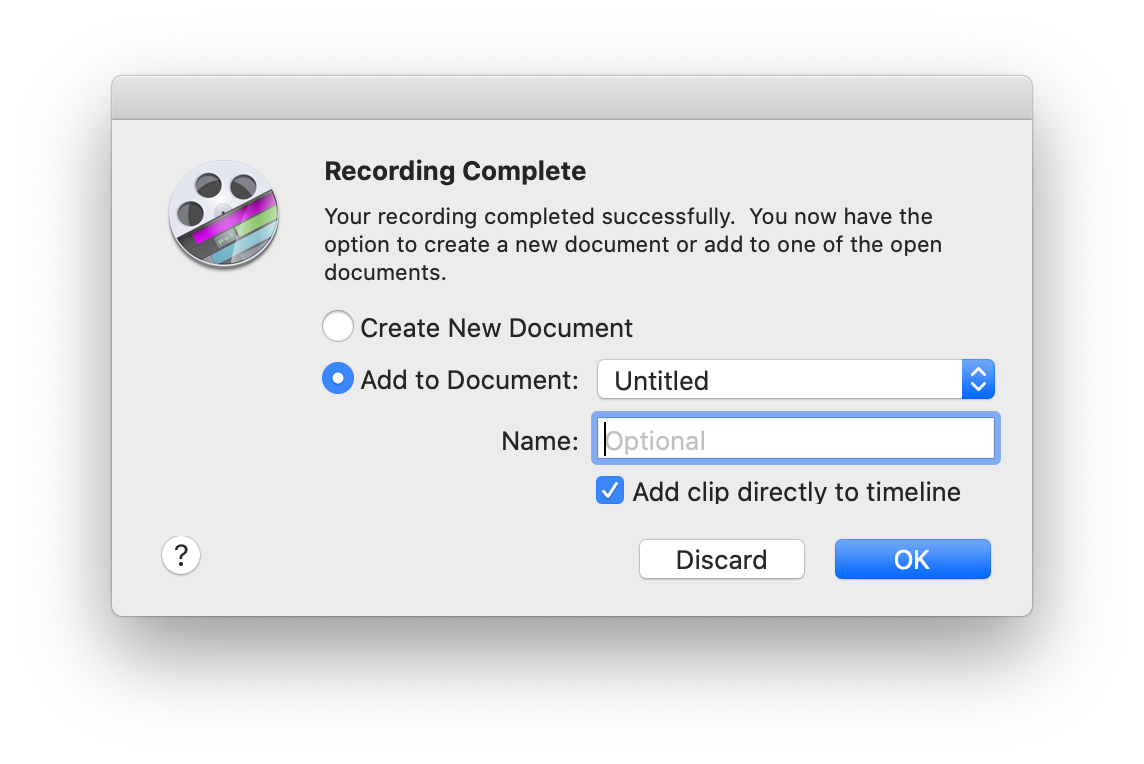
After that's recorded I add the recording to an Untitled document I have lying around and insert it into the timeline directly. I know I should be more organized but I'm not so that's what I'm sticking with it. I don't even name the thing.
The magic of editing
Ah editing. I love editing. My GIFs would be truly tragic without trimming, speeding, and panning.
Once my recording is imported into Screenflow it's time to make it shine. At this stage I make sure to resize the sides so it fits well in the window. I show a bit of the desktop background to make it a little more interesting.
At this point we have a recording that's normal speed and resized to fit the window. Hurrah! Now let's get stuck into this editing.
First off I try to get the time of the clip below 10 seconds. This means people won't have to wait forever for it to loop and it'll reduce the size of the file. There's two ways I do this:
- ✂️ Trim off any waiting around time. Sometimes my mouse and screen aren't doing anything. I find any dead time and press
Tto split the start of that part of the clip. Then I pressTat the end of that part. I end up with a section I can go ahead and delete so I press backspace 👋

2. ⏰ Speed things up. I'm pretty slow with my mouse as you saw earlier so I usually speed up the clip. To do that I double click and reduce the speed from there. I don't go overboard but I can normally trim a few seconds off and in a 10 second clip that makes a ton of difference.
Now we have a clip that's short and properly trimmed. What's next? Making it fancy of course! 💅
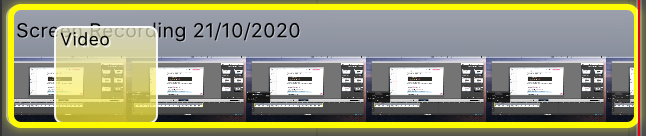
Zooming and panning is the key here. For the GIF above I used zooming to smoothly go in. To do this I head to video tab with the clip selected and press + Action.
A lil' transparent box will appear over the clip named Video. Right click that and you'll find a Curve menu. Hover and you'll see even more options.
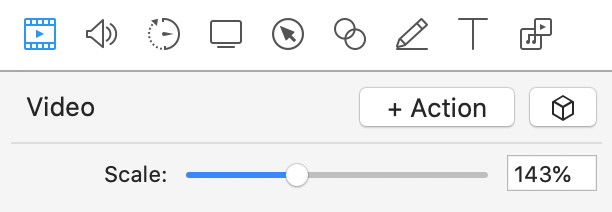
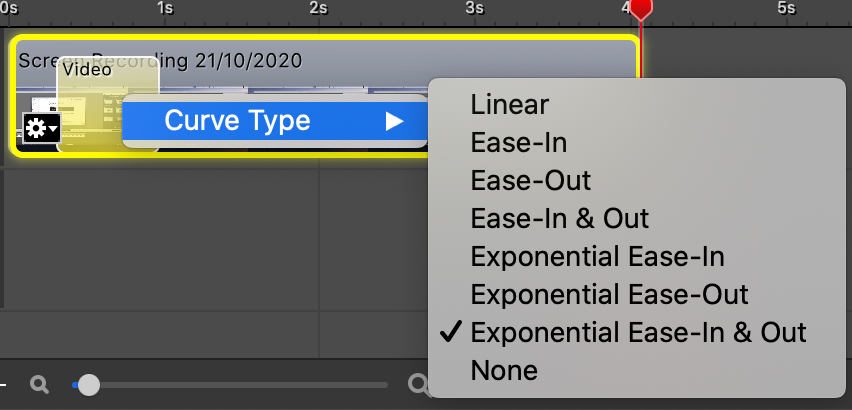
This is where you can control your animation as you zoom in. By default that'll be Linear but you can choose a different one. Personally I like Exponential Ease-In & Out but try it out and see what suits you.


After this point your time tracker (the red horizontal line) after the purple/yellow box. Then you can adjust the zoom level and it'll automatically animate the zoom in. It's pretty snazzy.
Now just repeat this process over and over again. Add as many video actions as you like but keep in mind the more panning and zooming the larger your file size will be. That's it!
Post-editing
There's one more staging and it's pretty important. It's about getting the right file type and reducing the file size.
We want a GIF but Screenflow is mostly made for video files. Luckily there's a feature buried for that. Export your clip (⌘E) and it'll be set on Automatic. Head to the Manual tab and underneath Preset select Animated GIF.
I select 1920 x 1080 as the resolution and tick motion blur Light sampling to make things a little smoother. Under the cog you can remove this step in the future by clicking Make Current Settings Default to save you a load of hassle later on.
And once you have the GIF? You'll wanna squash that file size. GIFs can get pretty huge. For that I use a tool called ImageOptim. It takes my files and reduces the size in a couple clicks.
Then I upload it to HelpDocs and BAM. I have a pretty GIF that doesn't require a click to play and is satisfying to watch.
The future of GIFs
We're always trying to make information easier to digest at HelpDocs and work out ways to make knowledge base articles more fun. So what's the evolution of a GIF?
Maybe it's autoplay videos on hover. Or enough information in context that you don't even need a GIF to explain it.
All I know is that this is what's working for us at the moment and I hope this post can help your customers like we've helped ours.